Atahualpa Basic Theme Customization Tutorial
Table of Contents:
- 1 Atahualpa Basic Theme Customization Tutorial
- 2 Getting Started:
- 3 Header Area
- 3.1 Navigation Menu Bar:
- 3.2 Configuring a Unique Header Area:
- 3.3 How to Change the Rotating Images:
- 3.4 How to Resize your Images for the Rotating Image Header:
- 4 How to Change the Background Colors of Your Different Tables:
- 5 Atahualpa Theme Related Resources:
What is Atahualpa?:
Atahualpa is a really great theme to work with if you are creating a professional website for an organization that requires a lot of categories or pages on your menu bar. You’ll find that other Wordpress themes do not have as many options; you don’t have the choice to alter most of the settings, which limits your creativity if you aren’t css/php savvy.
This tutorial is going to have a few tips for customizing this theme; I’ll be using a sample project of the UC Technology Leadership Institute to give you an idea of how this whole customizing thing works.
First, it is important to draw or sketch out how you want your website to look. Try to get really clear about what the goals of a site are; what needs to stand out (i.e. images, headlines, etc.) in your website in order for users to get a clear idea of what you are trying to share. You will need to plan out what pages will be on your site, how they might be grouped, and how users will easily find their way around.
Here are some things you should think about:
- Overall page structures and proportions
- Navigation (your different sections as well as the placement of the login/log out, calendar, help, site map, etc.)
- Important graphical elements
Getting Started:
How to install Atahualpa:
- Sign into your Wordpress admin main page
- On the left hand side you should see your toolbar, where you have the option to click “Appearance.”
- Click “Appearance”
- Click “Themes”
- Click “Add New Themes”
- Where it says “Search for themes by keyword, author, or tag” type in “Atahualpa.”
- Click the link that says install.
You should now have a working theme, and you are ready to start customizing different sections. To make sure that it is working, type in your website address.
It should look something like this:
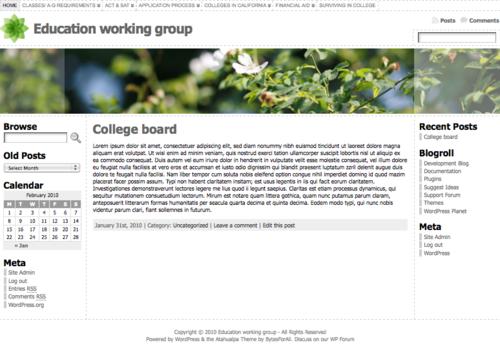
*Note: under this same appearances section (“Atahualpa theme options”) you have the option to customize the style of the different sections. Under each section, Wordpress gives you a pretty detailed step-by-step explanation on how to customize elements and your layout with color pickers and select menus.
Header Area
Navigation Menu Bar:
Next, we are going to work on creating categories/different page links. If you look at the screenshot above, you will notice the top menu navigation bar. Lets see what that looks like. Type in your website address and check it out. When you hover over each category “parent page”, additional drop down links to pages or “child categories” should appear.
*Note: “Parent pages” are the main categories that are on the navigation menu bar whereas; “Child pages” are the sub categories that show up when you hover over the main categories or the “parent pages”
- In order to edit your categories (“parent” and “child” pages), go to your pages section on the toolbar on the side of your dashboard (Wordpress admin page).
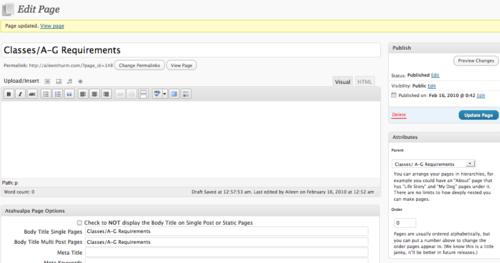
- Once the “edit page” shows up, type up the name of the “parent page” in the empty box at the top of the page.
- Under the “Body Title Single Pages” and the “Body Title Multi Post Pages” Type in your “parent page” name.
- Once you have finished, save your page.
Your should have something like this:
*Note: It may be easier to make all of your “parent pages” first before you make your “child pages”/sub categories.
To make a “child page,” repeat the same steps as above by typing in the text you want for your subcategory.
On the right hand side of the “edit page” you will see a box that says “attributes.” You have the option to click the scroll down menu. Choose which “parent page” you want the “child page”/subcategory to fall under.
Save your new edited page.
Configuring a Unique Header Area:
In this section you will learn how to reconfigure the placement of the different sections in the header area of your page to resemble that of another website. By practicing and observing how to make these changes using a sample page, you will understand where to go and what to do to to make your own unique header area.
Header Area Item Order:
I am going to use www.raisinghopeinc.org as a sample header to look at, but first, lets look at the default header area order of the Atahualpa theme so that we can compare the differences:
- Notice, the navigation bar (outlined in the color yellow) also known as “%pages” is on the top of the page.
- Underneath this navigation menu bar is the logo also known as “%logo” (outlined in the color red).
- To the right of it is the Blog Title. The last thing thing in this header area is the rotating header image bar also known as “%image” (outlined in green).
You’ll edit this order under “Atahualpa Theme Options.”
- Go on your WP Dashboard
- On the left sidebar, you should see “Appearance.” Under “Appearance” is “Atahualpa Theme Options”
- Click “Atahualpa Theme Options”
- Click the “Style & Edit Header Area” section.
We’re going to start with the box that looks like this first:

Notice, the default order “%pages %logo %bar1 %image %bar2”.
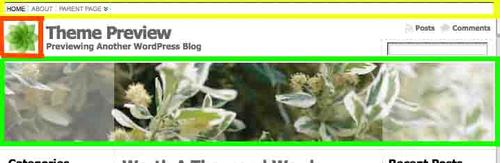
Now, lets look at the header area of the Raising Hope page:

Notice how the order of the header section has changed:
- First of all, they do not have a blog title that they used through WP. You can turn this off under “Show Blog Title” in this same “Style & Edit Header Area” section.
- Instead, they have created their own banner image (it includes the name of their organization and their logo) This section (“%logo”) is on the very top outlined with the color red. If you want to have a banner image and logo, create your own and upload it to your theme folder. I’ll explain how to do this a little bit later.
- Underneath this banner is the rotating header image bar (“%image”) (outlined in green).
- On the very bottom of the header section is the navigation bar (outlined in the color yellow) (“%pages”).
Raising Hope Inc. has re-ordered their header items to “%logo %bar1 %image %pages”. (Rearrange your header items in the order you want based on the 10 header items they list for you in the options.)
You should now have an idea of:
- how and where to reorder the items in your header
- how to hide the blog title on your page so that you can create a pre-made banner
Now, you will learn how to upload your pre-made banner or your logo to your website.
How to Change the Image Logo:
- Go into your C-panel (which you should have gotten when you purchased a domain name
- Double Click “File Manager”
- Double Click “Web Root (public_htm//www)” on the box that pops up
- Double Click the “WP-content” folder
- Double Click the “Themes” folder
- Double Click the “Atahualpa” folder
- Double Click the “Images” folder.
- In this folder there is a file name “logo.png”. Delete this image.
- Choose the image you want to use as your logo and name and save the image as “logo.png”
- Upload your image logo to the image folder
- Reload your website.
Congratulations! You have successfully changed the logo image.
How to Change the Rotating Images:
At the top of the page, you should notice the banner rotating image box. To change these images to fit the theme of your website, we are going to go into the C-panel.
- Go into your C-panel (which you should have gotten when you purchased a domain name
- Double Click “File Manager”
- Double Click “Web Root (public_htm//www)” on the box that pops up
- Double Click the “WP-content” folder
- Double Click the “Themes” folder
- Double Click the “Atahualpa” folder
- Double Click the “Images” folder
- Double Click the “Header” folder
- You should see three different image files. You can double click and download these images to see what they are and where the Atahualpa theme uses them.
- Now choose your own images.
- Upload your images to the theme folder. You can delete the photos that the Atahualpa has in this folder.
- Save your work and go to your website and check out your new rotator image header.
How to Resize your Images for the Rotating Image Header:
When looking at your image rotator header, you may have noticed that the size of your image is not the same size as the original images that the Atahualpa theme contained. In order to have your images fit the rotating image header size, you will need to resize your image to fit the “correct” header size (Width: 1300 pixels, Height: 160 pixels). To get your images proportionate, I would recommend that you choose a large horizontal photo that you can crop, and will be large enough to resize smaller if necessary. You don’t want an image that is too small; if you need to enlarge it, your image will be over pixelated and look less professional.
You can edit the image size in Photoshop or edit the images on http://www.splashup.com/. For those who are not familiar with photoshop, Splashup is an easy to use online photo editor.
Resize your image using Splashup:
- Sign up
- Click “Jump Right In”
- Click “file”
- Click “open image”
- Choose your images
- Under the menu bar “image,” click “image size”, and edit in 1300 for the width, and 160 for the height.
- Save your new image size
- Go back to your c-panel window and upload your RE-SIZED images to the theme folder.
- You can then delete the photos they have in this folder
- Save your work and go to your website and check out your new rotator image header
How to Change the Background Colors of Your Different Tables:
On the left sidebar of your dashboard of your WP Admin page there is an “Appearance” option. When you click it, other options should drop down. To edit different elements of your theme, click “Atahualpa Theme Options.” We will work with editing the background colors of the main table and the sidebars.
Main Content
Under “Overall Style & Config” there is a link to “Body, Text & Links.” Click this option.
You will edit the background color of your main content layout container (or table) in this box:
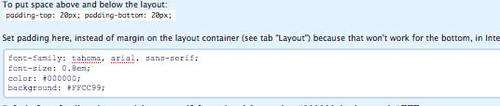
You can edit the background color by changing the hex color code where it says “background: #FFCC99;”
To choose/generate the color you want, you can go to this website
http://www.2createawebsite.com/build/hex-colors.html and follow their steps to choose the “perfect color.”
Replace “#FFCC99;” with the hex color code of your choice. Make sure not to remove the pound (#) or the semicolon (;).
Save your changes and view your site. You should have your layout container filled in with your new color and the background colors of the sidebars still in white.
Sidebars
To edit the background colors of your sidebars, click the option “Style and Configure Sidebars” under the “Sidebars & Widgets” section.
Go through the same step process as you did above (for the main content), except this time choose colors for all of the “background: #FFCC99;” (left side bar style, left inner sidebar style, right sidebar style, and right inner sidebar style).
Footer
To edit the background color of your footer, click the option “Style & Edit Footer” under the “Footer” section.
Follow the same steps as above and save your work, except this time add the color hex code in the first box “Footer Style,” where it says “background-color: #C7FCB2;”
Save your work.
Your page should now look something like this (I customized my main content color to be an orange like color, my sidebars are a yellow like color, and my footer is a green like color):
Atahualpa Theme Related Resources:
|
I like how the tutorial is fairly straightforward and easy to follow. I think a more in-depth look at how to customize basic things like the colors layout of menus would be useful. |
|
|
I think it is important to mention that the header images need to be the right pixel size or they will be cut off. It might also be helpful to have a screen shot in the explanation of how to upload the images. Other then that, I thought this was a good job! |
|
|
Atahualpa is a popular WordPress theme that can be customized to create a unique website design. Here are some steps you can follow to customize Atahualpa: Customize the Header: The header is the top part of your website and can be customized in many ways. You can change the logo, social media icons. Customize the Footer: The footer is the bottom part of your website and can also be customized. You can add widgets such as a newsletter sign-up fnf or a contact form. |
|
|
Minecraftle teaches children about the importance of trial and error. The colorful interface and user-friendly design make Wordle a hit with kids. |
|
|
share all templates please on tm whatsapp mods |
|
|
These customizations must be very careful, even a small operation will affect the content grade calculator |
|
|
You can receive the best service at Hotel Piscine Ardeche. |
|
|
Tierbestattung Albstadt in Balingen provides compassionate pet cremation services, honoring the bond between owners and their pets with dignity and respect. |
|
|
connections game: This could further enhance the clarity of the instructions. |
|
|
Unlike traditional baseball games, baseball bros io offers a fast, fun, and surprising experience. You will control funny cartoon characters in 1v1 matches, where every hit, pitch, or miss can lead to funny and sad situations. |
|

